How To Make a Beaded Loom Bracelet

When people hear about beaded bracelets, their first thought might be those friendship bracelets from our childhood. But hey, take a look at this gorgeous wide bracelet with poppies! It's chic, elegant, and completely customizable to your personal style. And the best part? You can make it yourself! In this post, I'll show you how to create a beautiful beaded loom bracelet.
You don't necessarily need a special loom tool to make a loom beaded bracelet. A shallow dishware or a plastic box lid works just as well (we prefer the lid, as it's lighter and easier to carry). Once you've finished your bracelet, you can use slider metal findings for the bracelet ends, or make a tapered ending, which we'll cover in a future post.
Did you know that you can also turn your bracelet into a choker by extending it or adding a long chain to it? But before you get started, it's important to note that loom patterns are an intellectual property. This means that you can't just use a picture you saved on Pinterest. You need to purchase the pattern, and we have over 50 patterns to choose from for all themes and holidays.
Once you've purchased a pattern, you're free to create as many bracelets as you'd like and even sell them. And if you need a little extra help, we have two YouTube tutorials to guide you through making a tiger bracelet and a poppies bracelet. Plus, keep an eye out for our upcoming post on loom fringe necklaces, which combines the loom technique we've just covered with the fringe technique we showed in a previous pattern.
You can watch a YouTube tutorial or go on and read the text version of it.
Materials You Will Need
Before we get started, let's make sure you have all the materials you will need:
- A loom tool or a shallow dish/box lid etc.
- Miyuki Delica beads in various colors
- Beading thread (I prefer Nymo D)
- A beading needle
- Scissors
- Clasps
- Beading mat (optional)
Choosing Your Pattern
The first step in making a loom beaded bracelet is choosing your pattern. Nikobeadsua.com offers a wide variety of patterns to choose from, ranging from simple to complex designs. Choose a pattern that fits your skill level and the look you are going for.
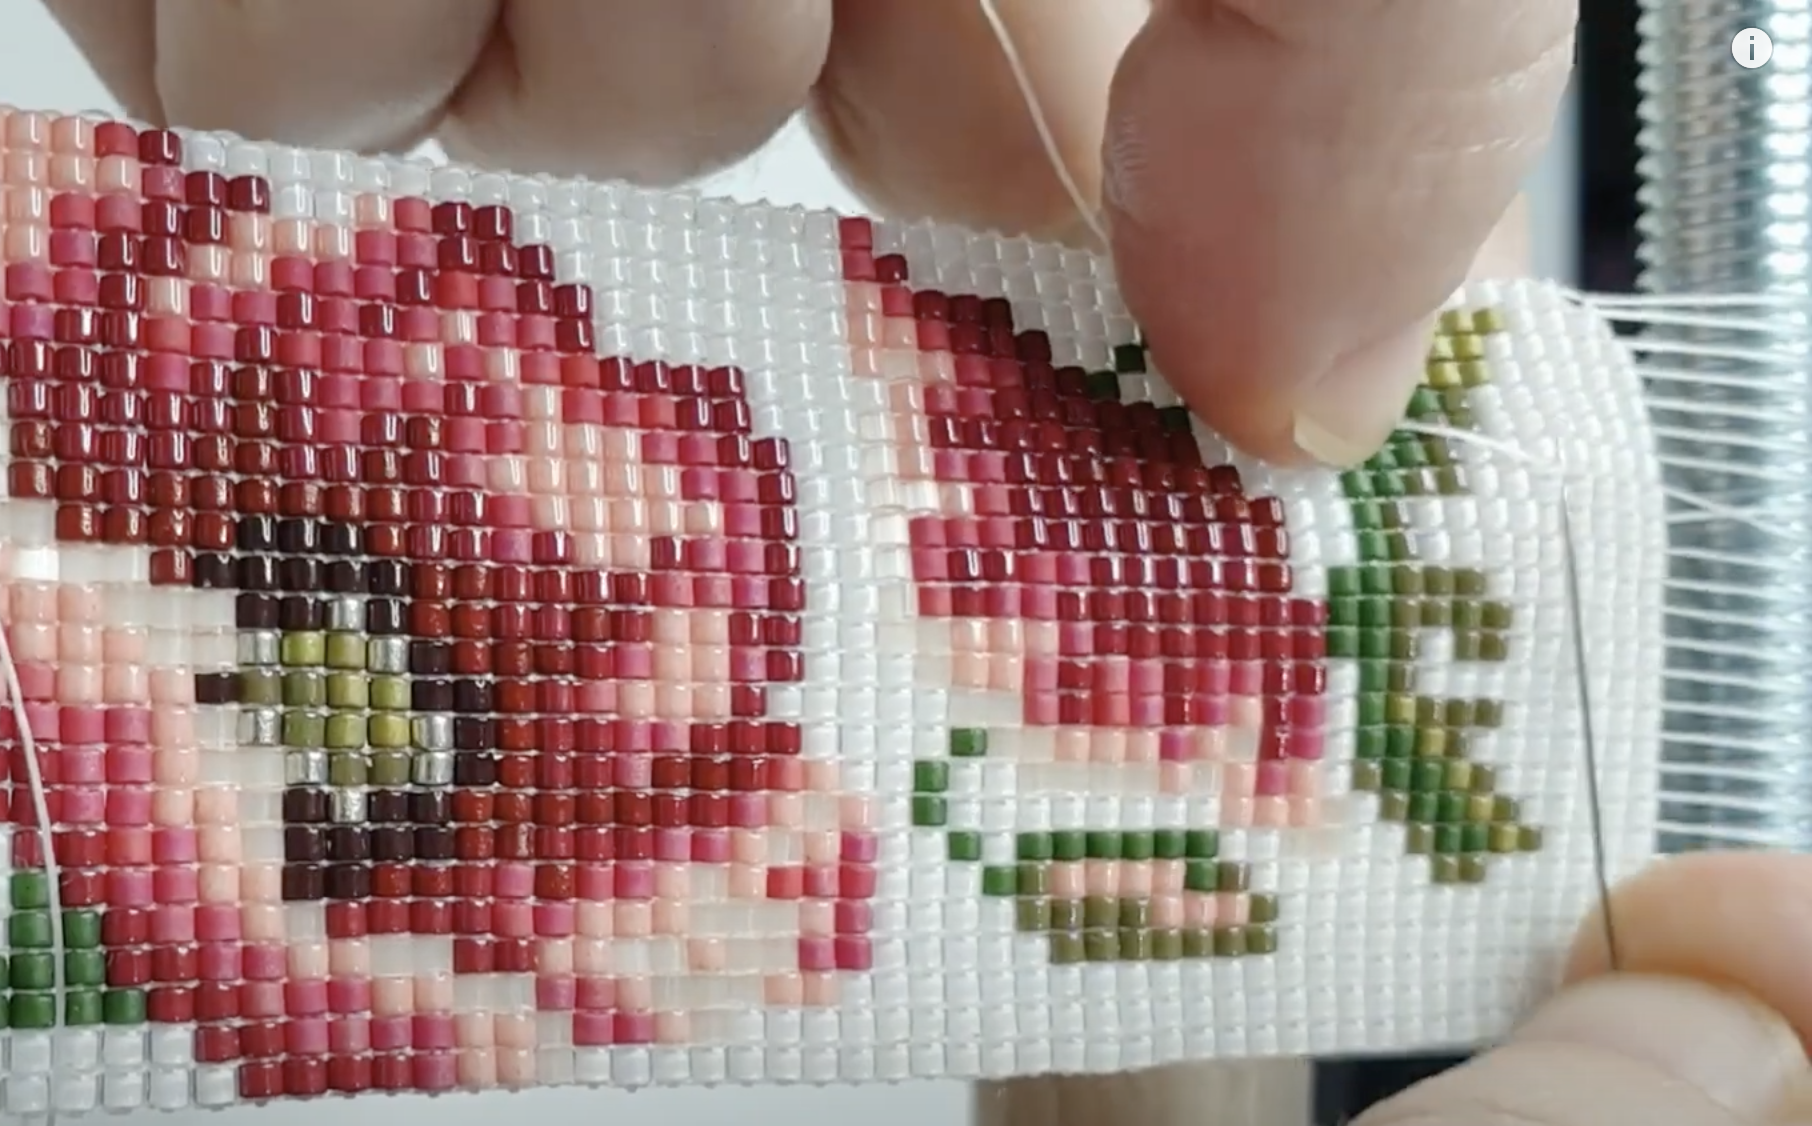
In this tutorial I’ll be showing a gorgeous poppy loom pattern. I’ve changed a few colors to the ones I had on hand, but it didn’t hurt the bracelet. You can experiment with colors and beads, too!
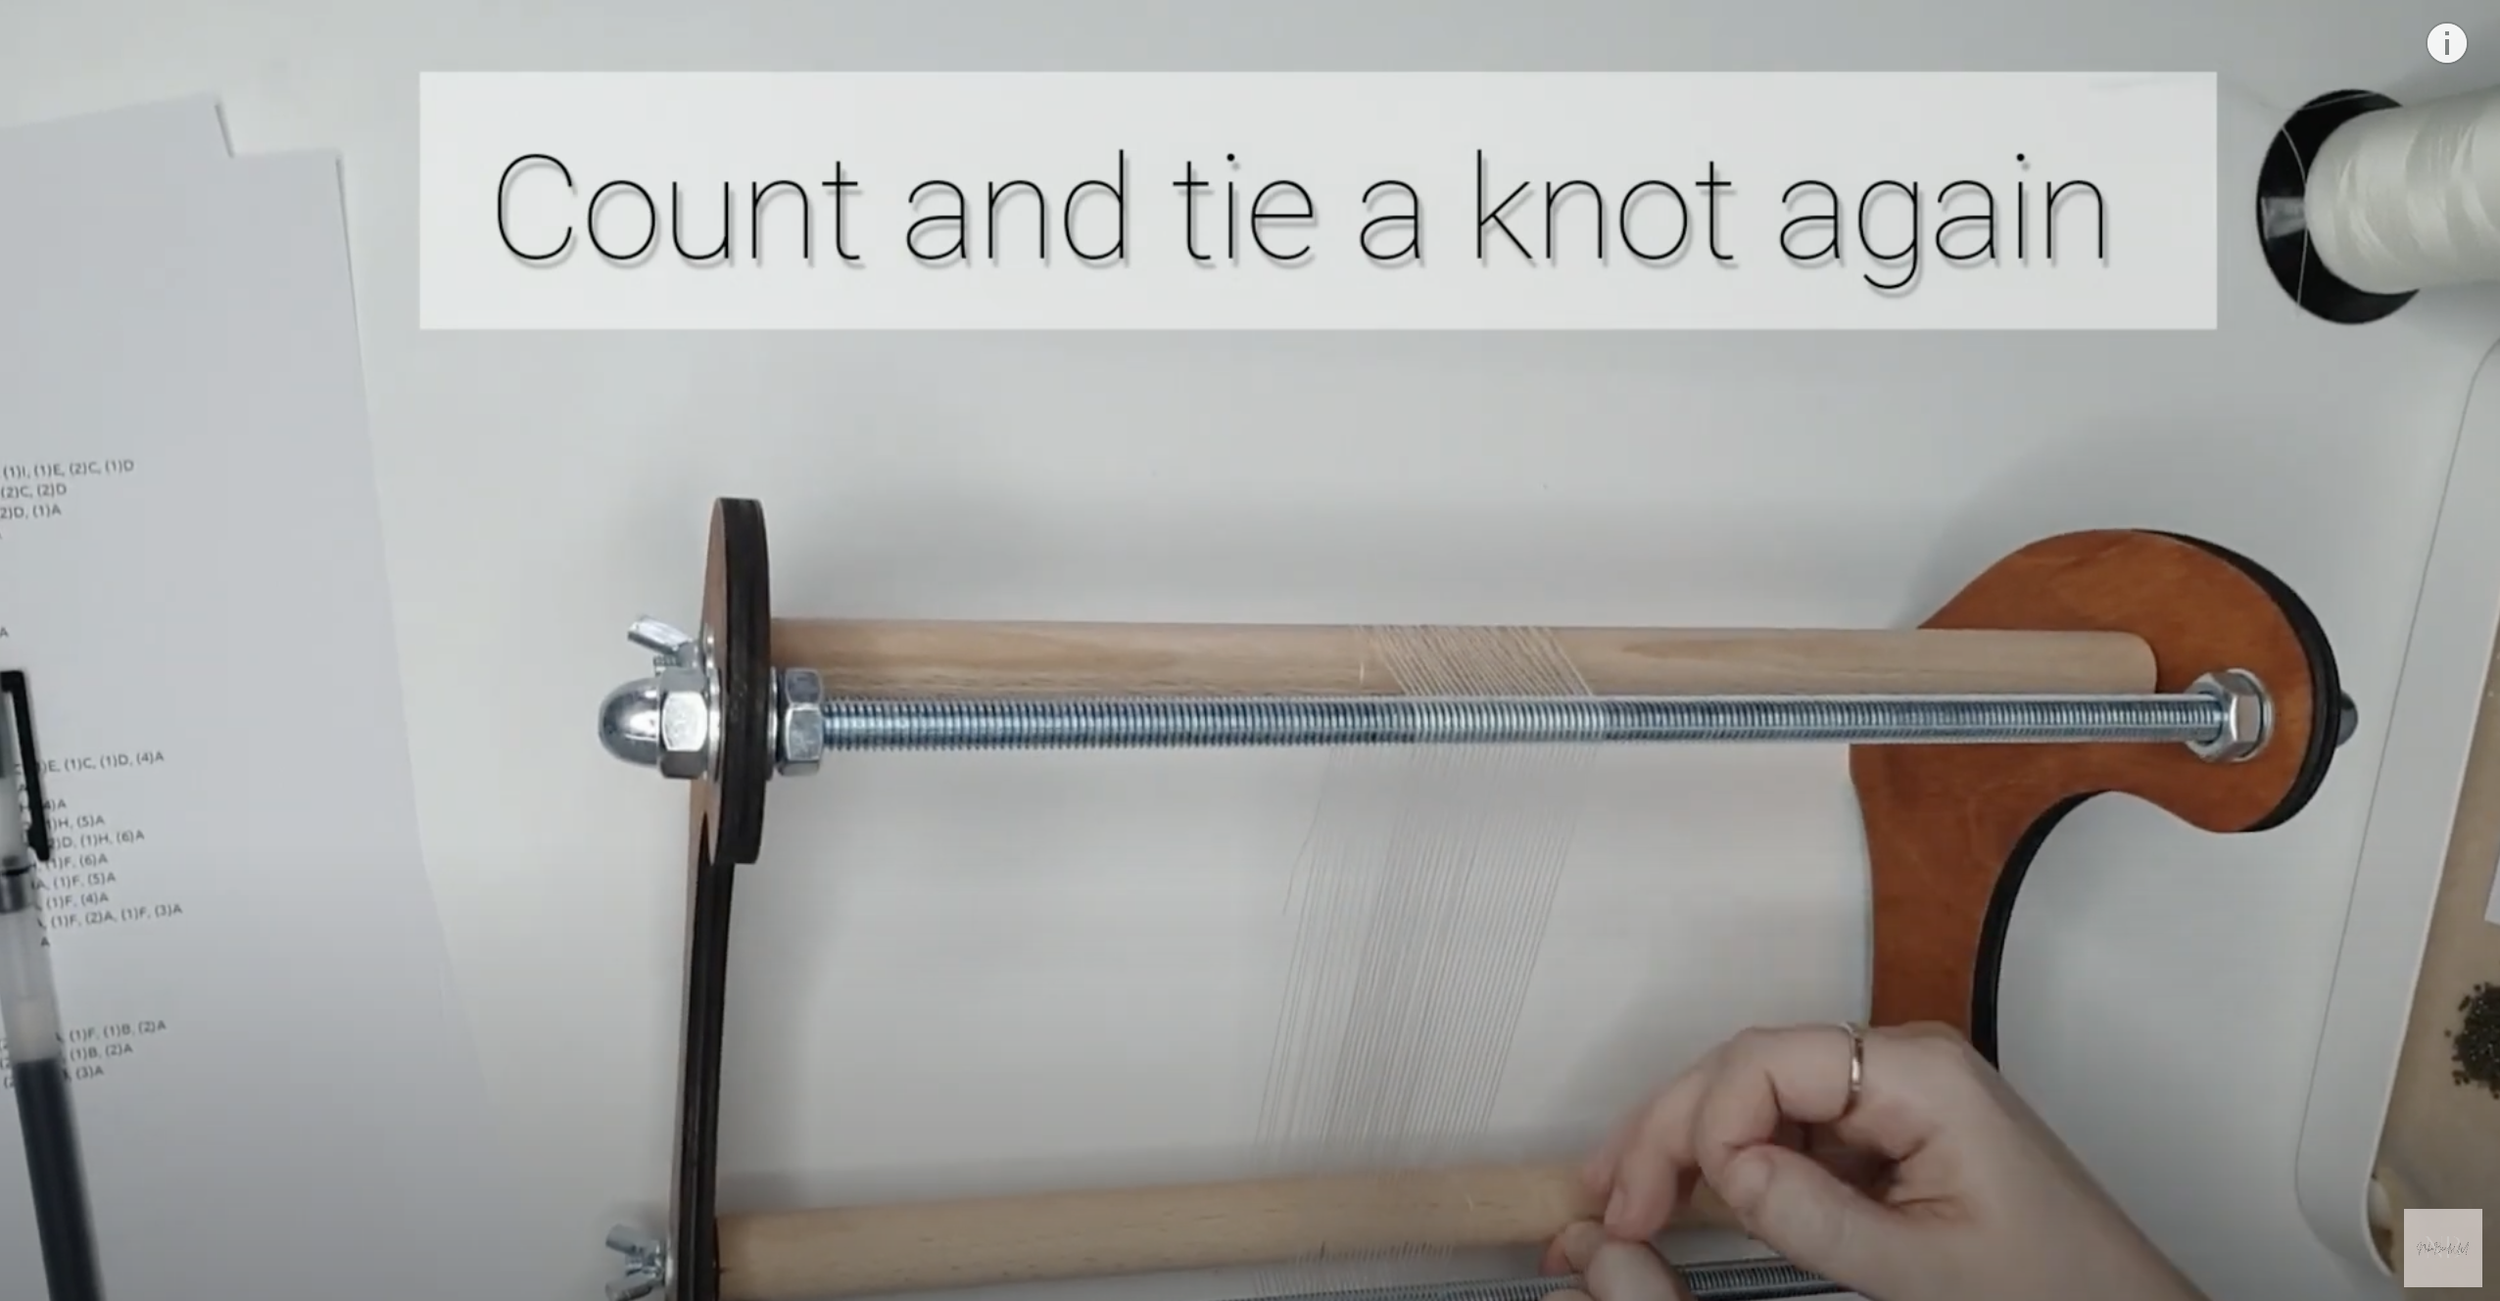
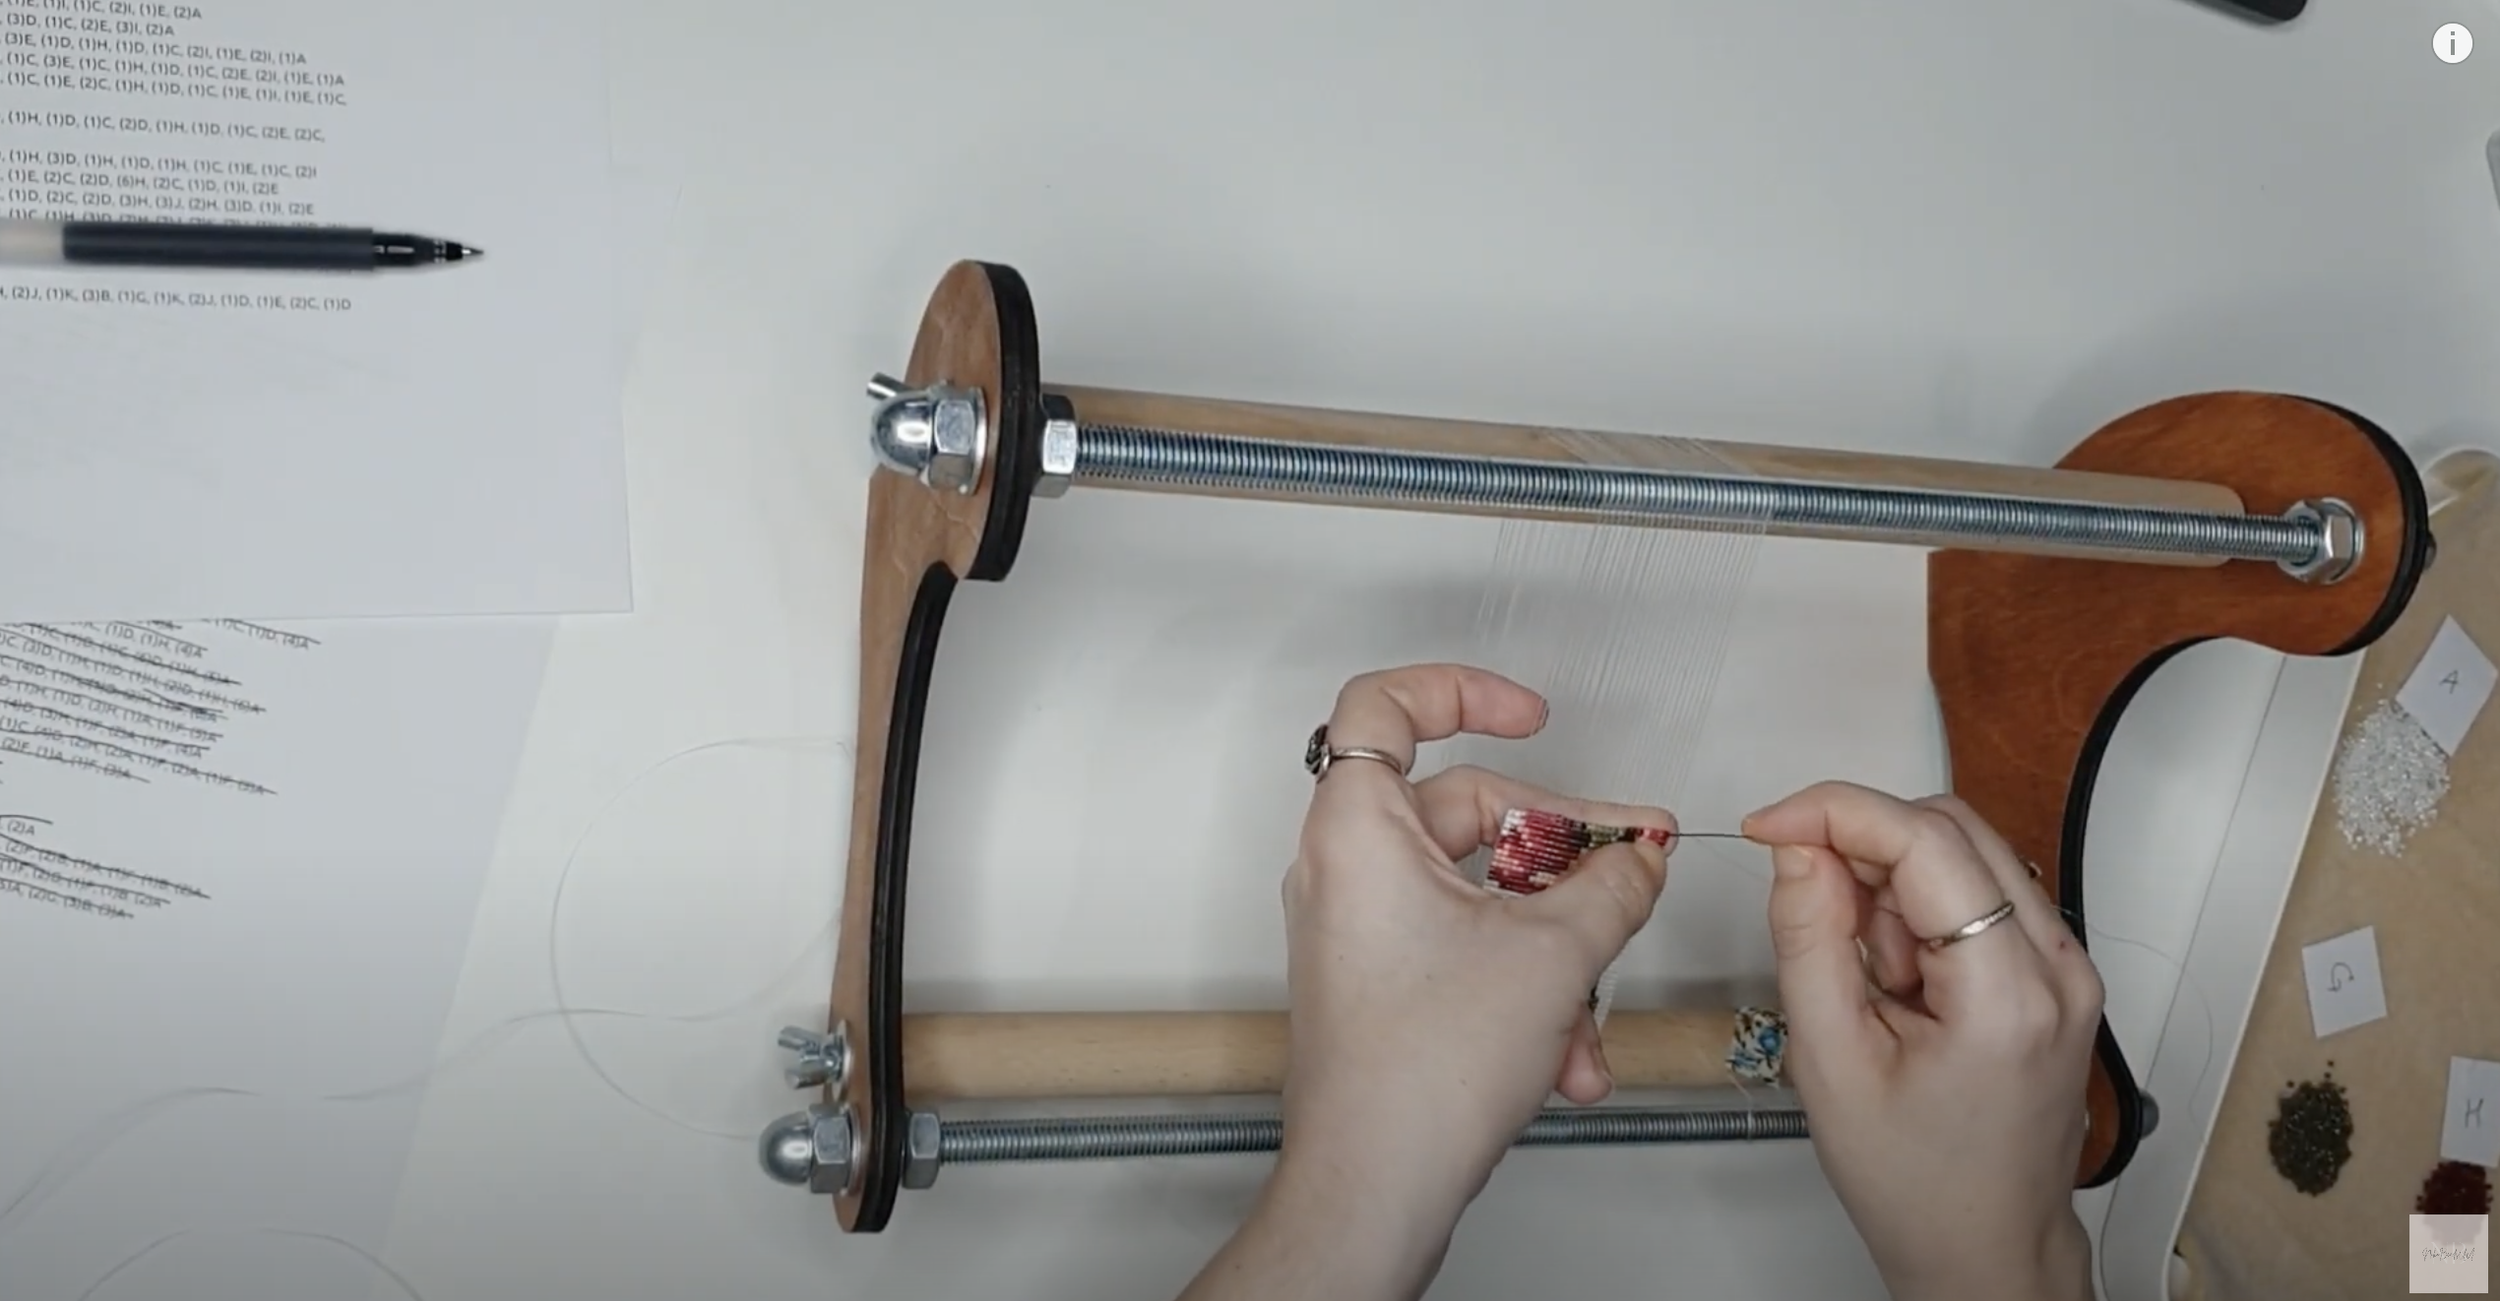
Setting Up Your Loom
Once you have chosen your pattern, it's time to set up your loom. Place your loom on a flat surface and attach your beading thread to the loom's warp threads. Begin by stringing the beads onto the thread in the order specified by your pattern. In case of poppy we have 25 beads width, so I warp 26 beads (25 beads + 1).
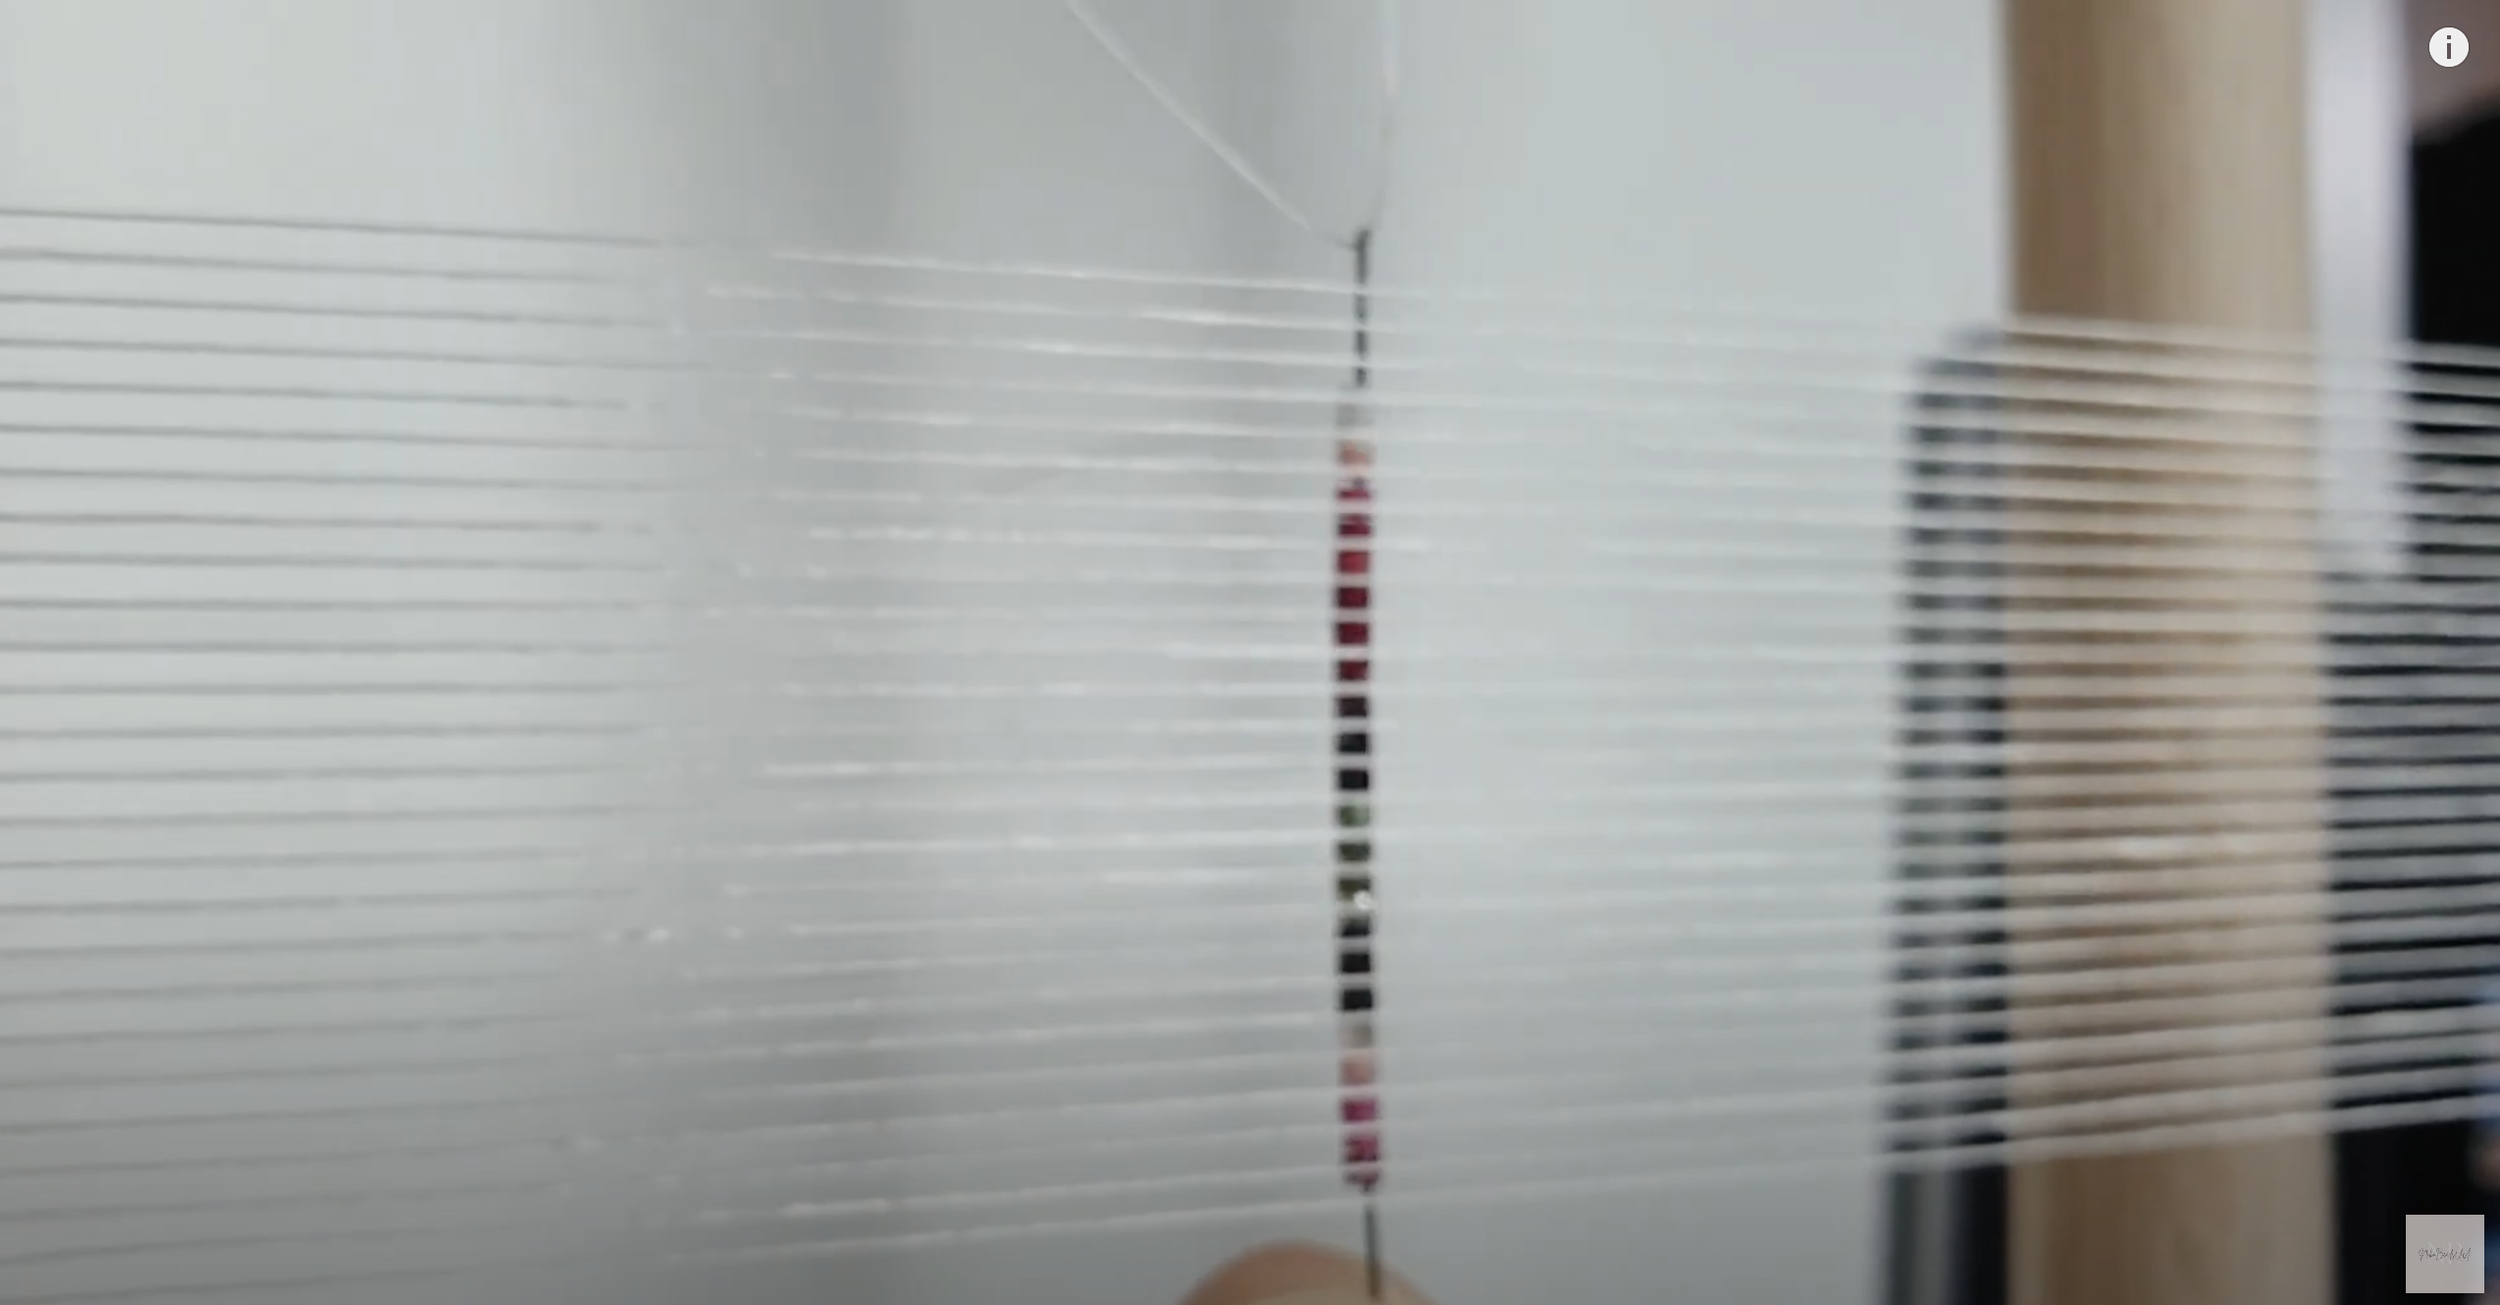
Weaving Your Beads
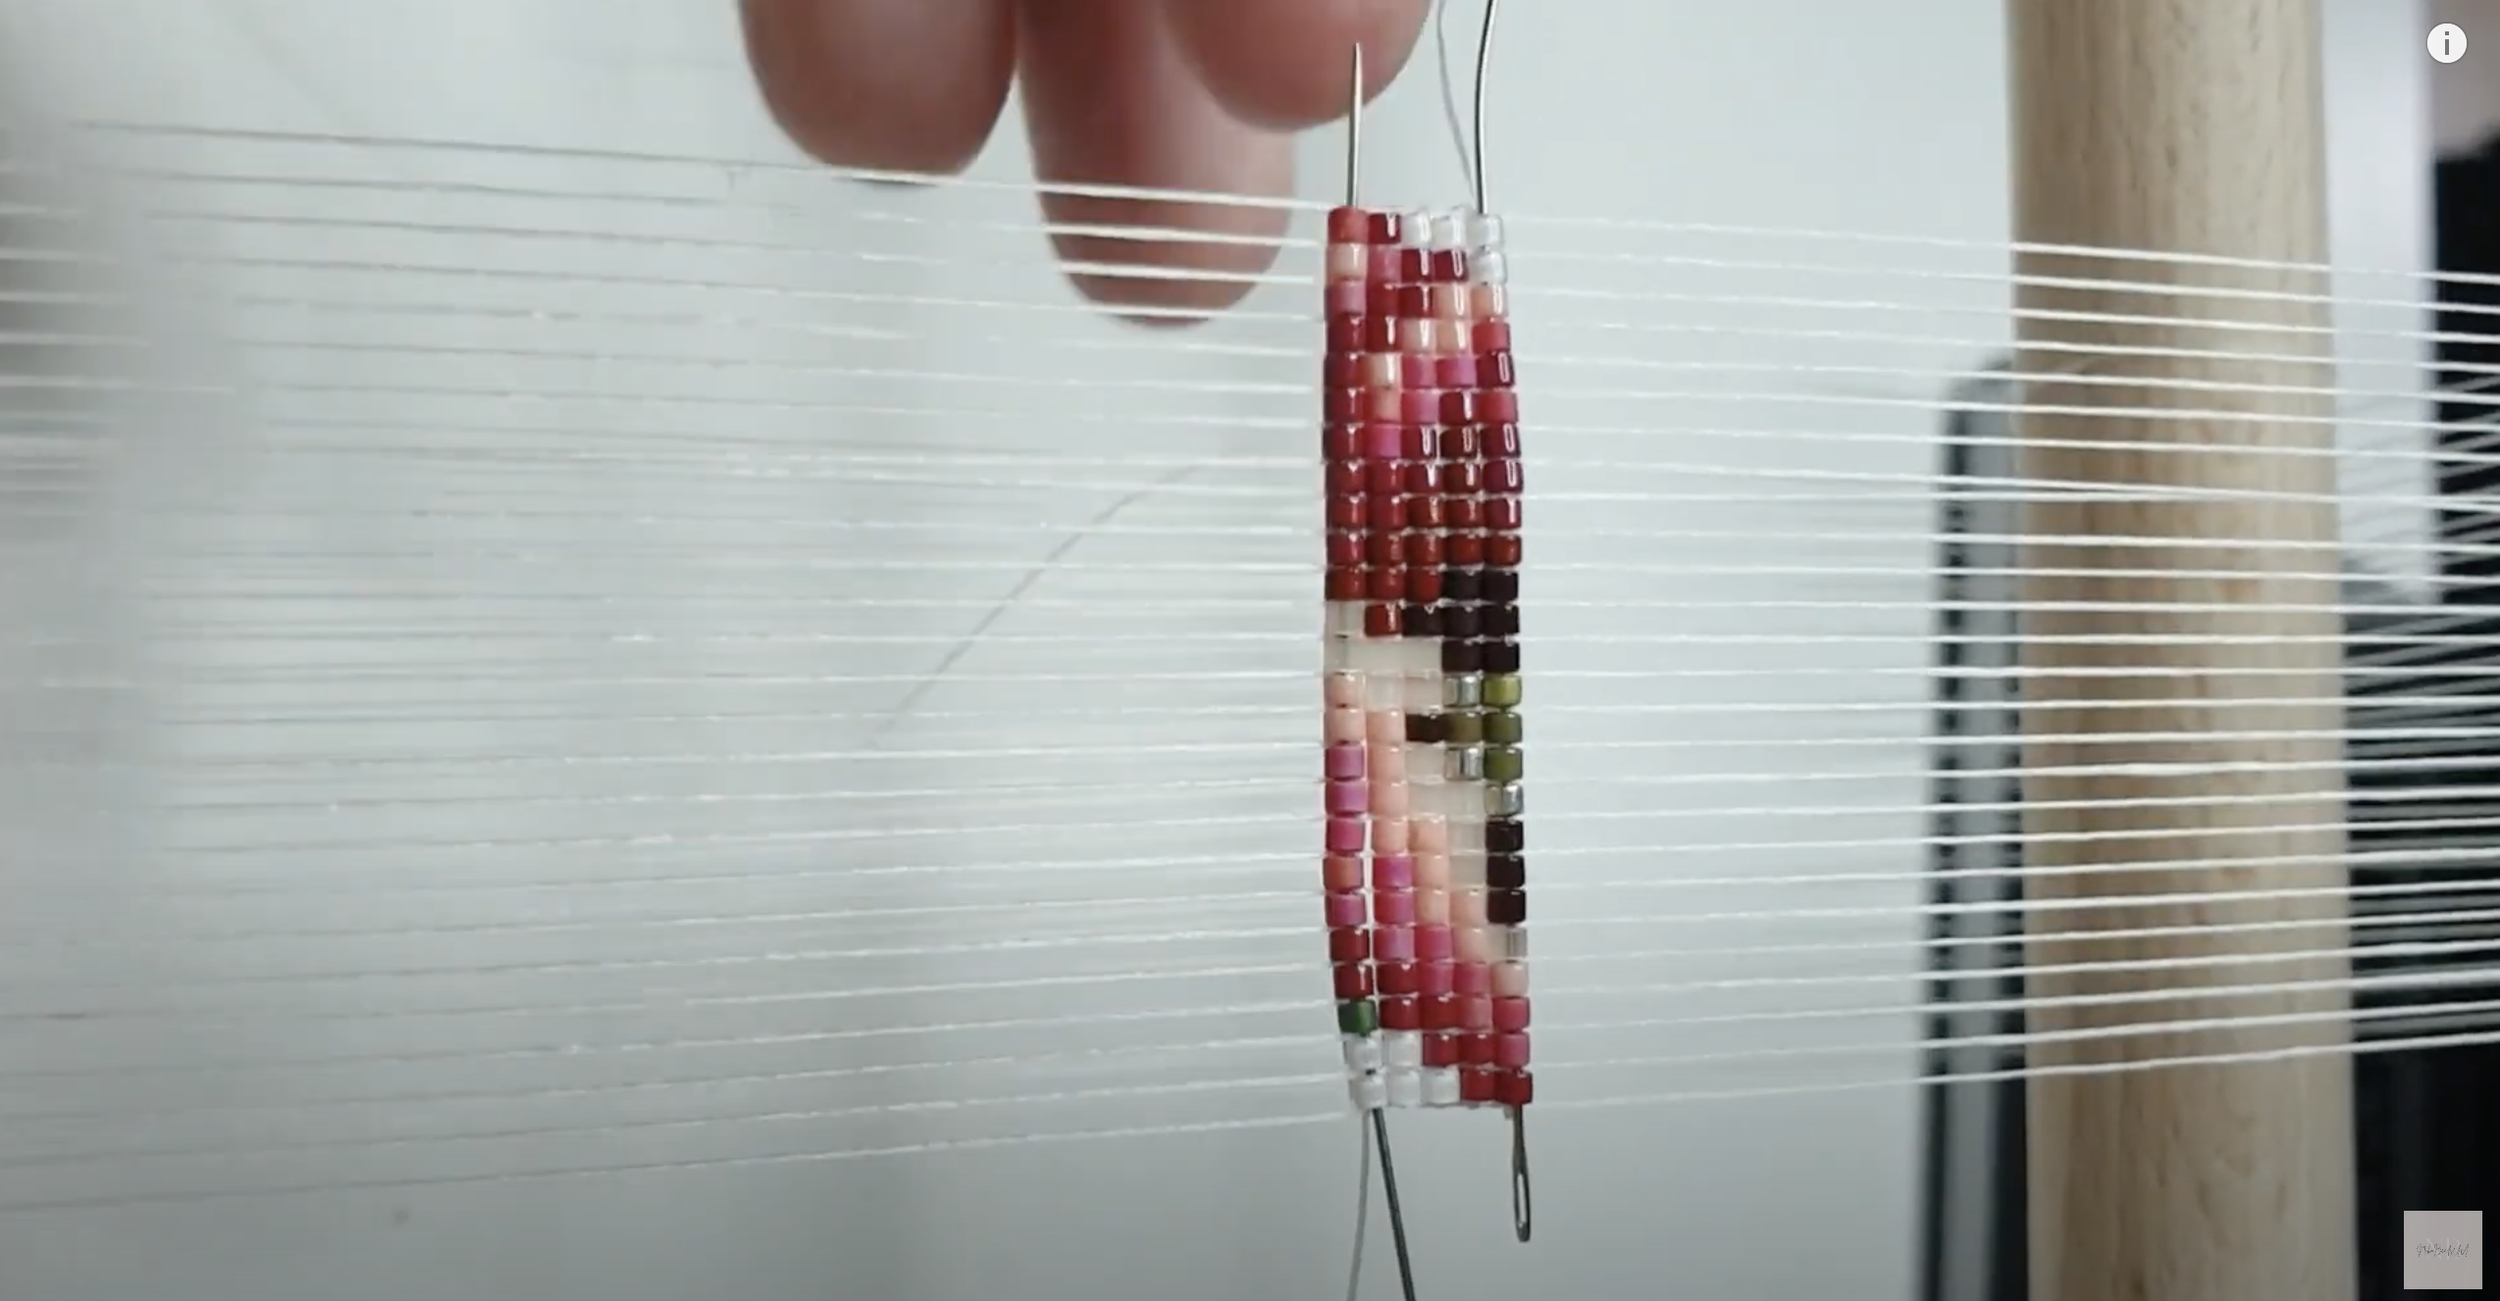
Once you have strung your beads onto the thread, it's time to start weaving. I like to start weaving from the center of the pattern and leaving a long thread to come back to it later. So I take 25 beads from the central row, place them on the middle part of a long thread and place them UNDER the warp threads.
Now, the first row is the struggle. You have to carefully place each bead between two neighbouring threads and the pass the needle through this bead in an opposite direction.
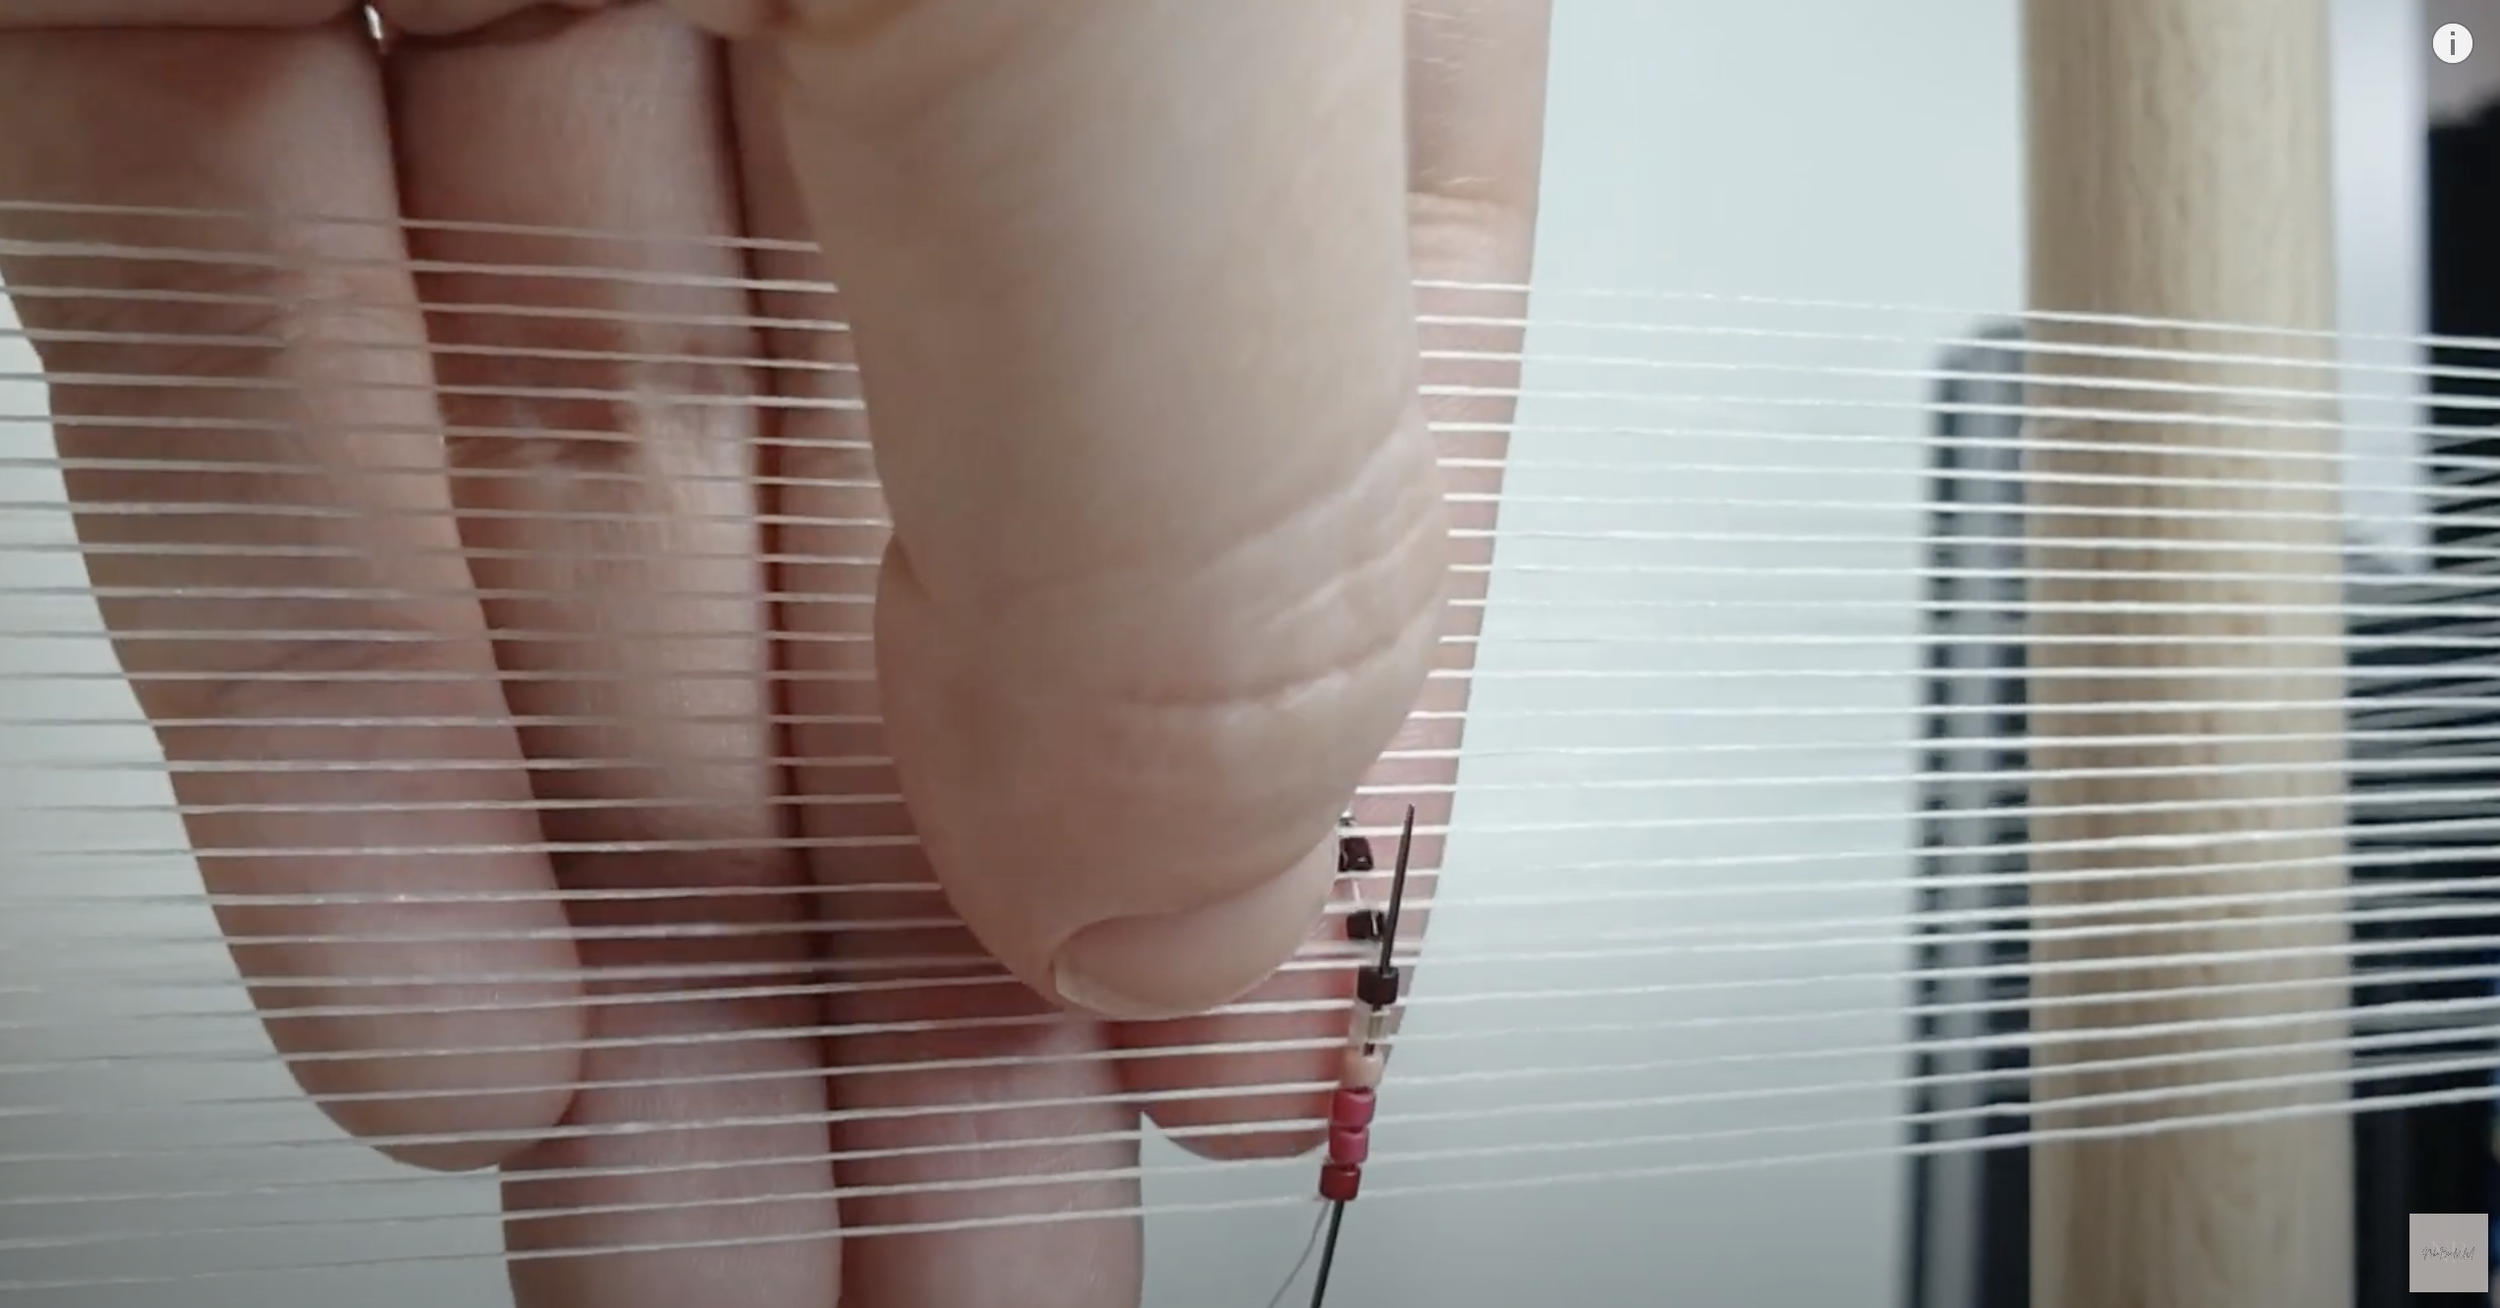
This is how you “catch” each bead between threads. Continue weaving back and forth, following the pattern until you have completed your bracelet.
When you’re finished with the second half of the bracelet, it’s time to move to the first half. Remember we’ve left a long thread? We’ll need it now.
Finishing Your Bracelet
Once you have completed your bracelet, it's time to finish it off.
First of all, weave in all threads back into the bracelet. I usually pull the needle through 5-6 rows back, tying a few random knots on my way.
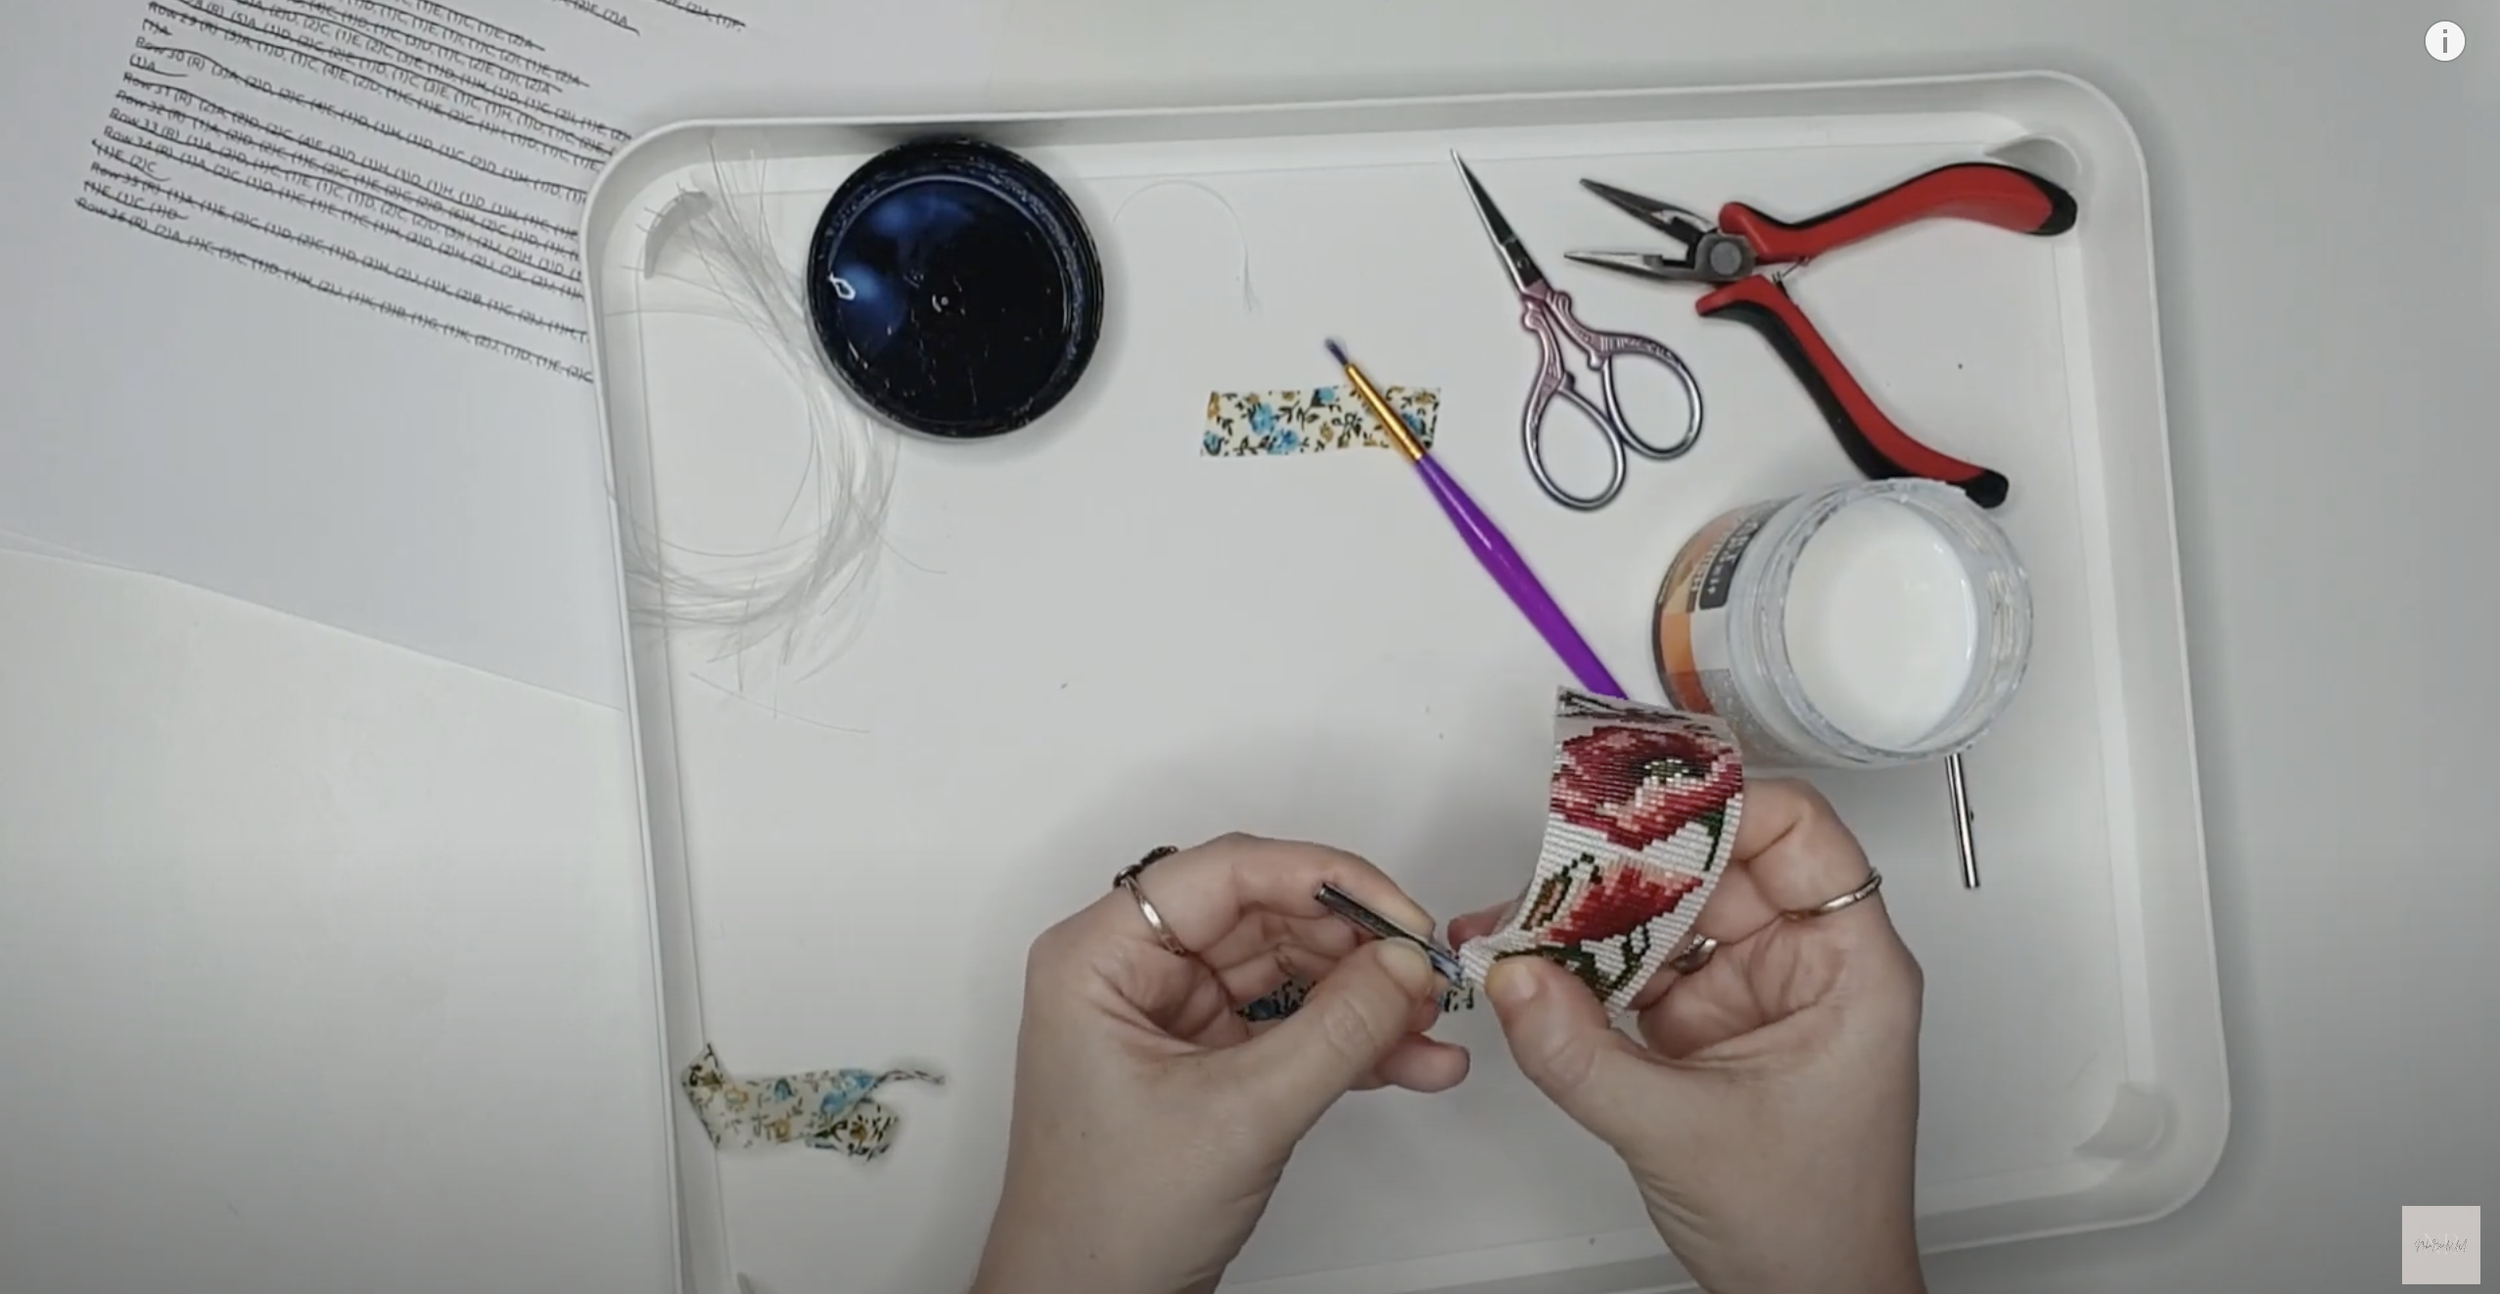
Remove your bracelet from the loom and trim the excess thread. Tie all neighbouring threads. I do it twice: I tie the thread 1 + 2, then 3 + 4 and afterwards tie 2 resulting thick threads together one more time. And then 5 + 6, 7 + 8 and the resulting threads 56 + 78. Cover the ties with a glue or varnish and let it drie.

Trim the access threads and attach your clasp to each end of your bracelet using jump rings and pliers.
Tips for Success
Here are a few tips to help you make the perfect loom beaded bracelet:
- Use a beading mat to keep your beads in place.
- Use a beading needle that is thin enough to fit through your beads.
- Make sure your tension is consistent throughout your bracelet.
- Take breaks to rest your eyes and hands.
Conclusion
Now that you know how to make loom beaded bracelets using Miyuki Delica beads and a pattern from nikobeadsua.com, you are ready to get started on your own beautiful creations. With a little practice, you will be making stunning bracelets in no time.
FAQs
1. Can I use different types of beads for loom beading?
Yes, you can use different types of beads for loom beading. However, Miyuki Delica beads are recommended for their consistent size and shape.
2. How do I know what size loom to use for my bracelet?
The size of your loom will depend on the size of your bracelet. Measure your wrist and add a half inch for a comfortable fit.
3. Can I make my own loom for loom beading?
Yes, you can make your own loom for loom beading using materials such as cardboard or wood.
4. What is the best thread to use for loom beading?
The best thread to use for loom beading is a strong beading thread such as Nymo or Fireline.
5. Can I use a pattern from another website for loom beading?
Yes, you can use a pattern from another website for loom beading. Just make sure to credit the original source.
Remember, you can experiment with different types of beads and thread to achieve different results. And if you need more guidance, be sure to check out our YouTube tutorials on making a tiger bracelet and a poppies bracelet. Happy beading!

Nataliya Timoshina
Founder of NikoBeadsUA - a small business that focuses on providing unique digital beaded jewelry patterns and tutorials. Started this journey in 2019 as a handmade beaded jewelry maker on Etsy and then transitioned to digital patterns.

